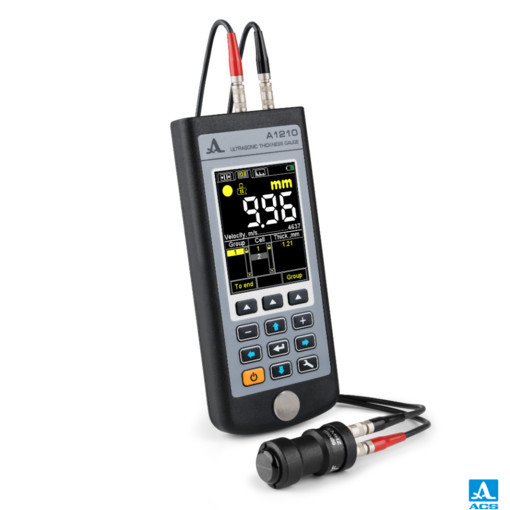

The thickness gauge can operate at the mode of displaying results as digital data or at the mode with graphic imaging of the signal A-Scan.
The A-Scan feature rules out false results considerably increasing the inspection reliability. It makes possible to perform express search of foreign inclusions and laminations and to get accurate results of measuring through polymeric (polyethylene), varnish and paint and other types of insulating coating.
The thickness gauge A1210 offers a whole range of features to provide easy and effective work:
-double-crystal and single-crystal transducers;
-patented system of automatic adaptation to the surface curvature and roughness;
-patented auto correlated algorithm of measuring for pinpoint accuracy of results eliminating the influence of the single-crystal transducers’ near field zone at small thickness.
The large TFT display ensures full visual control of the inspection process with the help of color indication.
The cover with build-in magnetic holder helps to fix the thickness gauge safely to metal surfaces for comfort work at hard-to reach places and at heights.
Thickness measurement of pipes, boilers, vessels and variety of other metal parts as well as cast iron, plastic and other materials with high ultrasound attenuation.
Using the single crystal transducers S3567 2.5A0D10CL and S3569 5.0A0D10CL with wear-resistant protector allow to:
– conduct thickness measurements of thick-walled products made of metal, cast iron, plastic and other materials with high ultrasound attenuation;
– conduct express searching for foreign inclusions and laminations;
– obtain reliable results when performing measurements through paint coating;
– scanning of the inspection objects.
Using the double crystal transducer D1771 4.0A0D12CL allows to:
– perform measuring at corroded surfaces as well as at flat smooth surfaces without any additional adjustments, which makes the process of inspection much easier and faster.
– obtain reliable results when performing measurements through polymeric (polyethylene) and other types of insulating coating in the A-Scan mode.
| Thickness measurement range(for steel) with transducers: S3567 2.5A0D10CL | from 0,8 to 300,0 mm |
|---|---|
| D1771 4.0A0D12CL | from 0,7 to 300,0 mm |
| Discreteness of thickness measuring for thickness range: from 0,7 to 99,99 mm | 0,01; 0,1 mm |
| from 100,0 to 300,0 mm | 0,1 mm |
| Basic measurement accuracy for thickness X, mm not more: for thickness from 0,7 to 3,0 mm | ±(0,01Х+0,1) mm |
| for thickness from 3,01 to 99,99 mm | ±(0,01Х+0,05) mm |
| for thickness from 100,0 to 300,0 mm | ±(0,01Х+0,1) mm |
| Minimum curvature radius | 10 mm |
| Ultrasound velocity range | from 500 to 19 999 m/с |
| Display type | TFT |
| Power | built-in LiPol accumulator |
| Operation time without re-charging | 9h |
| Operating temperature | from -20 to +50 °С |
| Size of the electronic unit | 161 х 70 х 24 mm |
| Weight of the electronic unit | 230 g |
• A1210 – ultrasonic thickness gauge
• Transducer S3567 2.5A0D10CL
• Transducer D1771 4.0A0D12CL
• Single LEMO 00 – LEMO 00 cable 1,2 m
• Double LEMO 00 – LEMO 00 cable 1,2 m
• 220 В – USB adapter
• USB A – Micro B cable
• Soft cover
• Case